How to Make Zombie Cookies


I’ve always been a fan of making zombie cookies. Zombies were one of my earliest cookies I ever made, and I’ve been making different zombie cookie versions with each passing year. This year was no different.
Although I’m a zombie fan, I’m not big with gore. So I wanted these zombie cookies to reflect that. I came up with this zombie cookie set that wasn’t too frightening, yet still represented the zombie essence people know and love. (You know, the “I’m undead and I will eat your flesh if you don’t run” kind of essence.)
Here’s a quick tutorial on how to make these zombie cookies.
Zombie Cookie Cutter Set
To make these zombie cookies, I used this zombie cookie cutter set, which was just posted to the shop.

The set consists of a zombie head and a zombie hand cutter, which can also be purchased individually.
The zombie cookies you see in the example images of this post is of the LARGE size. I’ll be decorating just the head for this tutorial, but the hands follow similar decorating steps.
Template for the Zombie Cookies
To help with the decorating process, I made a PDF template of all the designs of my 2019 Halloween cookie collection, including this zombie head cookie design.
Click the link below for the downloadable template PDF file.
This file is four pages long and is rather large in data size. Just a warning, it might take a moment before the file opens in your browser.
The Decorating Process
For these zombie cookies, you will need the following suggested colors:
- Zombie Skin Green royal icing. (I mixed Americolor Wedgewood with Forest Greenand a tiny touch of Super Black.)
- Darker Zombie Skin Green icing. (I mixed a higher concentration of color gel of the zombie skin green icing above.)
- Light Zombie Green icing. (I mixed a dollop the zombie skin green icing above with fresh white royal icing.)
- Brain Pink icing. (I used a tiny touch of Americolor Tulip Red.)
- Teeth Tan icing. (I used Americolor Ivory.)
- Black Mouth icing. (I used Super Black.)
Step 1
For those without a projector, begin by making guidelines for the brain, ears, and mouth sections, as shown. I made a template with template plastic from the PDF file above and used a food marker to draw the guidelines on the cookie.

Step 2
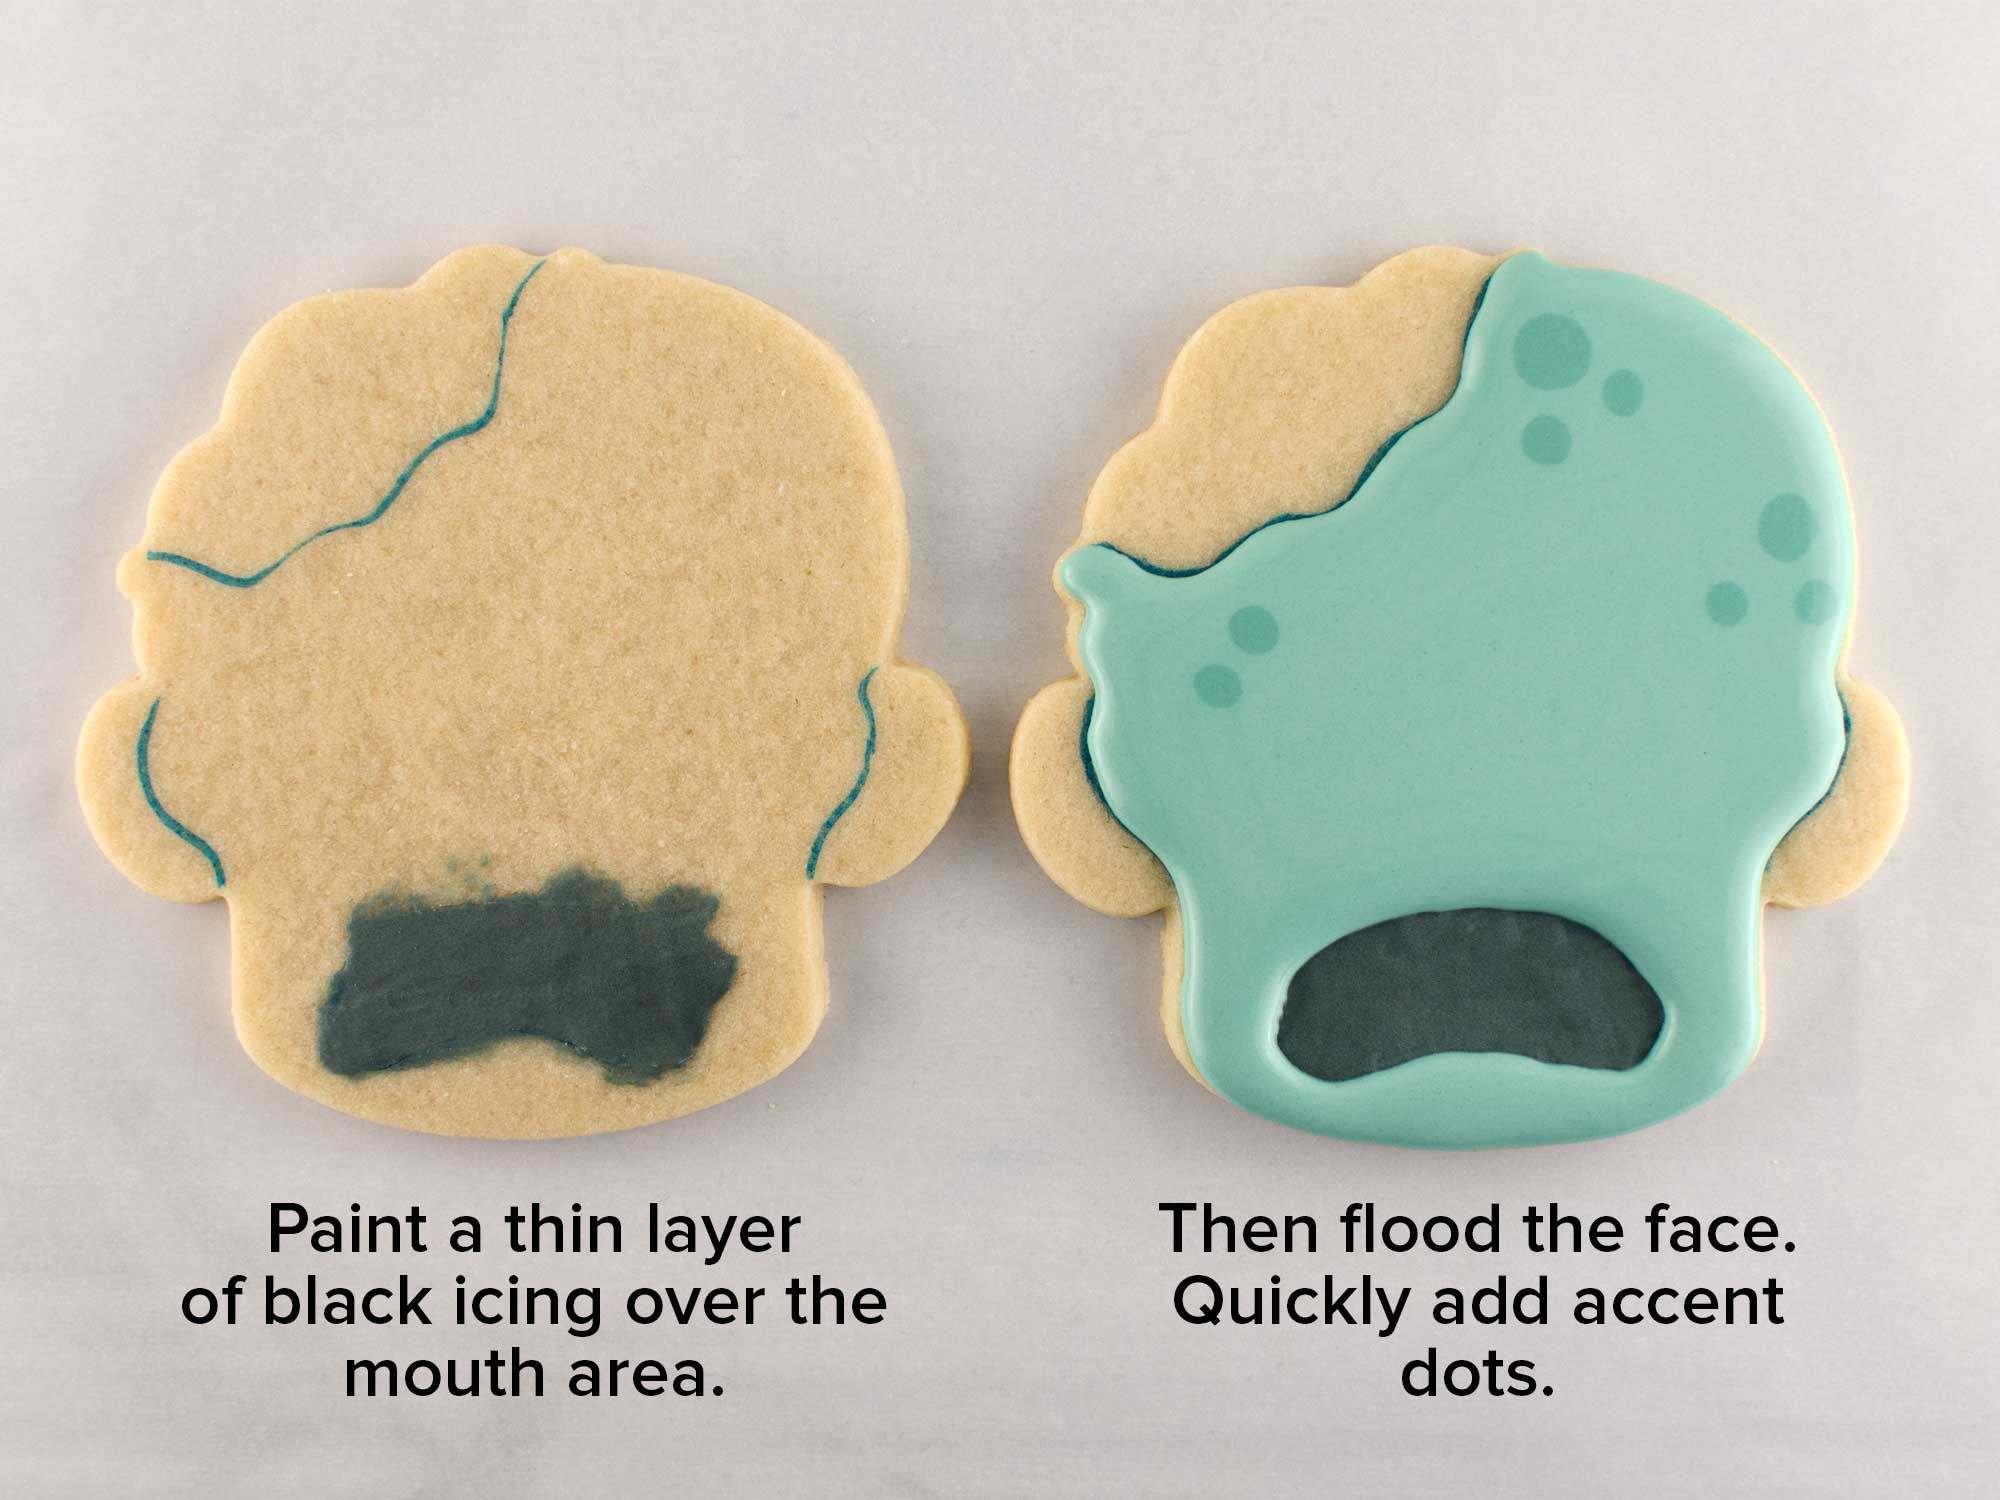
Start by first brushing on a thin layer of black icing for the mouth. Be sure to use a paintbrush that you only use for food. Allow this icing to set.
Then outline and fill the surrounding face area with zombie green icing. Quickly add the skin spot accents with the darker green icing. Shake the cookie to smooth the surface.
Step 3
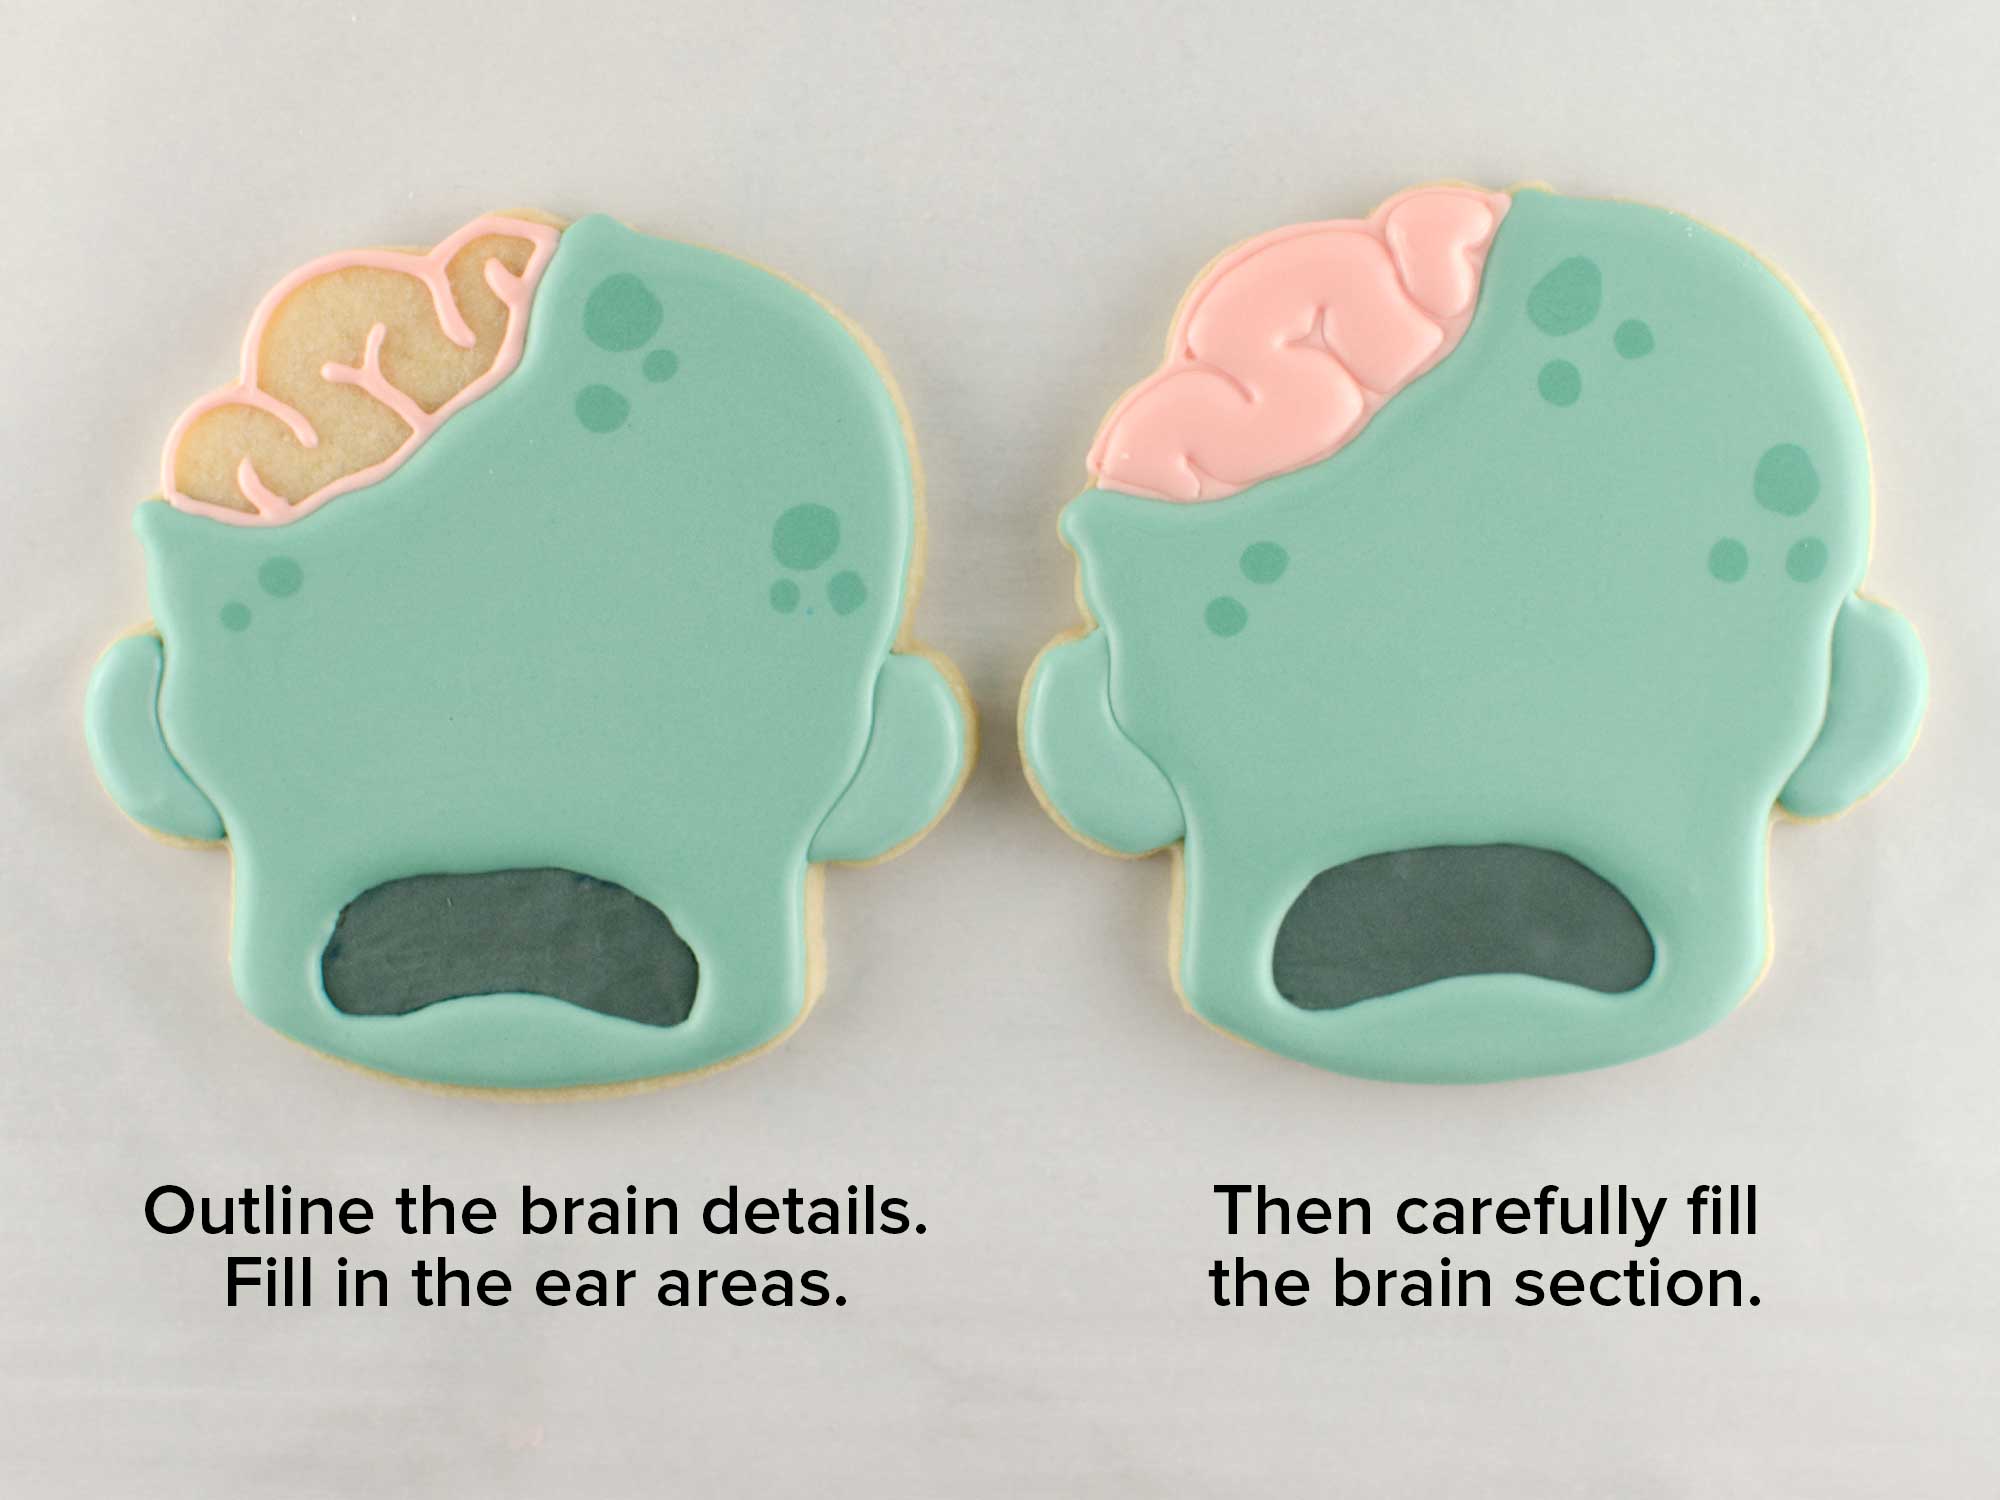
Next, add the brain detail. First, with a #2 tip, outline the brain section as shown with pink icing. Let this icing set for about 5 minutes. Meanwhile, fill in the ear areas.
Then, carefully fill in the section with pink medium icing, trying to not get icing over the outlines.
Step 4
After the base had time to set, add the eyes with the light green icing and the three teeth with tan icing.
Finally, add the facial outlines with the darker green icing.

Video Tutorial
The steps above are summarized in this time-lapsed video I put together.
Here are the finished zombie head cookies along with its two hand cookies.
The left hand was made with the same zombie hand cookie cutter as the right hand. I just flipped the cookie dough cutout over before baking.

The zombie cookies shown are the LARGE size option for the set. They make a great gift if placed in this 12″x5″ BRP cookie box.
This is just the first of many new Halloween cookie tutorials I’ll have available on the blog soon. Please stick around for more fun and spooky cookie ideas over the coming weeks.


